
Skyview Towers Locations and Guide
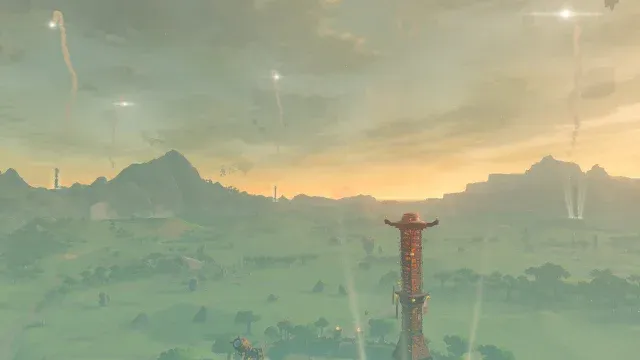
How to Unlock the Skyview Towers
After reaching the Surface for the first time in Tears of the Kingdom you must travel to Lookout Landing and complete the Find Princess Zelda tasks in Hyrule Castle. After completing those and returning to Lookout Landing, talk to Purah to activate the Lookout Landing Skyview Tower. After this, you can complete all 15 Skyview Towers.
How to Uncover the Map: Skyview Tower Tips

- Skyview Towers glow with white light and can be seen better at night and even better from the sky.
- You can activate every Skyview Tower in Tears of the Kingdom after activating the Lookout Landing Skyview Tower after completing the early mission Crisis at Hyrule Castle.
- Skyview Towers can be used to reach the Sky and many other places conveniently by using the launchpad to fling into the Sky.
- You generally won’t need warm clothes in the Sky, but you will need them if you drop to colder areas near the Surface.
How to Uncover the Depths Map
Skyview Towers reveal all Surface and Sky areas but not the Depths maps. All Towers are on the Surface. There are no Towers in the Depths nor in the Sky. Note that the Depths have Light Roots that both illuminate the Depths and fill out your map of the Depths. The Light Root locations correlate with the Shrines above them. So if you find a Shrine, you can search below for a Light Root to uncover them. All Light Root and Shrine locations can be found on the Tears of the Kingdom Interactive Map.
Skyview Tower Guide: Locations and Puzzle Solutions
In the Skyview Tower Guide pages below are instructions for how to reach each Skyview Tower and how to open and activate each tower as well, as many contain puzzles you need to solve to activate them.
Jump to a Tower Solution
Lookout Landing Skyview Tower
Hyrule Field Skyview Tower
Lindor’s Brow Skyview Tower
Upland Zorana Skyview Tower
Sahasra Slope Skyview Tower
Rospro Pass Skyview Tower
Pikida Stonegrove Skyview Tower
Thyphlo Ruins Skyview Tower
Eldin Canyon Skyview Tower
Ulri Mountains Skyview Tower
Mount Lanayru Skyview Tower
Rabella Wetlands Skyview Tower
Popla Foothills Skyview Tower
Gerudo Canyon Skyview Tower
Gerudo Highlands Skyview Tower
The order of the Skyview Towers below is ‘’’also the recommended order in which you should unlock them.’’’ Note: You can activate every Skyview Tower in Tears of the Kingdom after activating the Lookout Landing Skyview Tower, nothing prevents you from doing so!However, you may want to at least see the Things to Do First in TotK.
Click on a section below for a full puzzle guide, walkthrough, video guide, screenshots and locations for the Skyview Towers.
Lookout Landing Skyview Tower
Lookout Landing Skyview Tower - Reveals the Central Hyrule region.
How to Activate the Tower
Lookout landing Skyview Tower is on the west side of Lookout Landing and is activated as part of the main storyline.
Hyrule Field Skyview Tower
Hyrule Field Skyview Tower - Reveals the Central Hyrule region.
Location
This tower is hard to miss from the Lookout Landing Skyview Tower. It’s south and a bit east of Lookout landing and just a smidge south of Mayachin Shrine on a hilltop, surrounded by spiked walls on all but one side.
- Tower Map Coordinates: -0753, -1019, -0064
How to Activate the Tower
On the east side of the tower is a highly fortified entrance and drawbridge. You can fight your way up this or you can sneak in and rush the tower – a far easier method.
To do so, approach the hill from the south and move counterclockwise to the bridge/entrance. Climb the cliff out of site of the enemies here at the southeast point of the hill. At the top of the bridge is a single bokoblin scout and a small fence holding back a spiked ball. You can use the Ultrahand to move this hand out of the way. You will still need to smash the boards blocking the entrance or slip behind it. Do so and it’s a short dash to the tower which, yes, you can activate while enemies attack you.
After opening the door, approach the pedestal to the right. Activate the panel here to activate the tower. You can now step on the pad to unlock the area map. Doing so will reveal the map for Hyrule Field region, both surface and sky.
Lindor’s Brow Skyview Tower
Lindor’s Brow Skyview Tower - Reveals the Hyrule Ridge area in the west.
Location
Lindor’s Brow Skyview Tower is due west of Hyrule Castle. You can approach the tower easily, but it is surrounded by a lake or pond on all sides and sits on a stone column that is difficult to reach without building your own bridge.
- Tower Map Coordinates: -1919, 1241, 0273
How to Activate the Tower
On the southwest side of Lindor’s Brow Skyview Tower is a pile of wooden building materials. You need to make a bridge to the tower’s rock base and Ascend through it.
Use Ultrahand to grab the wide sheets of wood, and connect them end-to-end to form a floating bridge to the small overhang in the rock you can see from the wooden supplies platform.
Your bridge can be moved into the water and you can adjust it so you can see the green shadow just under the rock ridge – this should give you enough space to run out on the bridge and use Ascend to reach the tower top.
Upland Zorana Skyview Tower
Upland Zorana Skyview Tower - Reveals the Lanayru region in the east.
Location
The Upland Zorana Skyview Tower is due east of Hyrule Castle and a bit south. A road from Hyrule Castle leads to the base of this tower. It is also easily reached by floating in from the Elden Canyon Skyview Tower.
- Tower Map Coordinates: 2858, 0582, 0379
How to Activate the Tower
There’s a huge amount of sludge laying around the Upland Zorana Skyview Tower and blocking the tower door. Talk to the Zora collapsed in front of the tower stairs.
Bazz is trapped in sludge and will ask for help, hinting at the solution: Water. You’ll need a Splashfruit to solve this problem. These grow in the area: They are light blue, glowing fruit on short bushes.
Tap R to hold your weapon and then press UP on the DPAD to select another item to throw. Aim a Splashfruit at the sludge on the door and it will dissolve away. A more expensive option would be to use an Opal, which also create a water splash when thrown. You can also free Bazz this way to finish setting up the tower.
Sahasra Slope Skyview Tower
Sahasra Slope Skyview Tower - Reveals the Necluda region the east.
Location
Sahasra Slope Skyview Tower is in the foothills east of Hyrule Field. Cross the river at a bridge and you can walk there easily.
- Tower Map Coordinates: 1344, -1170, 0166
How to Activate the Tower
How To Unlock: The door is stuck at Sahasra Slope tower. Speak to the man outside the tower. He'll tell you about Sahasra Slope Cave, a place where he used to hunt mushrooms. If you can find this cave, perhaps you can use Ascend to enter the tower!The Sahasra Slope Cave is on the northwest corner of the rocky plateau the tower resides on. Find the entrance and get your rocks and sticks reading for Fusing: You’ll need to mine your way though. Enter the cave and mine your way to the right.
In a room with two small gray rocks and one gray large boulder (that you can move with Ultrahand to reveal a treasure chest), you can use the Ascend ability – this is directly under the tower icon on your minimap! Inside the tower you’ll find two long sticks propping the doors closed. Remove them with Ultrahand.
The man outside will assist in activating the tower.
Rospro Pass Skyview Tower
Location
You will likely encounter this tower as part of the Tulin of Rito Village main quest, which leads you right to it. It is up a long road into the Hebra Mountains that begins at the Hebra Trailhead Lodge, north of Rito Village.
- Tower Map Coordinates: -3686, 2342, 0233
How to Activate the Tower
You will need two warm clothing items or warming food/elixir to survive the cold Hebra Mountains. This tower has no puzzle to solve, you can walk (and climb) right up to it and activate it. It is surrounded by thorns, which you can either jump/paraglide over from a higher point or burn with a Fire Fruit (thrown or Fused to an arrow), by setting a fire with Flint and Wood (drop both and strike with a metal weapon), or via other fire methods.
Pikida Stonegrove Skyview Tower
Pikida Stonegrove Skyview Tower - Reveals the Hebra region in the far northwest.
Location
You will need warm gear or warming food or elixirs before attempting the Pikida Stonegrove tower. Pikida Stonegrove is far north and slightly east of Hyrule Field. Approach from the southern side and you'll see a broken bridge hanging from the cliffside.
- Tower Map Coordinates: -2304, 3066, 0433
How to Activate the Tower
Use Ultrahand to piece together some nearby planks and you can use those to climb up. You can also make a fire, throw a pinecone in, and use the draft to paraglide up.
Thyphlo Ruins Skyview Tower
Location
The Thyphlo Ruins are located due north and a bit east of Hyrule Castle, north of the large Great Hyrule Forest, which you’ll have to avoid on your way here. On the west side of Hyrule Castle is a road that leads north to the end of Hyrule Gorge and, at a fork, leads west to the Tabantha Tundra and east to the Thyphlo Ruins. This tower is sticking straight up in the middle of the ruins.
- Tower Map Coordinates: 0344, 3133, 0810
How to Activate the Tower
The Thyphlo Ruins Skyview Tower cannot be activated and a Rito named Billson is not that helpful in figuring out why. Note the number of floating platforms around the tower: One of these is actually blocking the top of the tower, where a hatch must open to activate the tower.
Start with the platform to the left of the tower when facing the doors. Use Ascend to climb onto this platform and eliminate the enemy. You can attach the one of the two rockets here using Ultrahand to the platform and whack them to get it rising upwards.
This should be more than enough to let you reach the top central platform above the tower hatch.
To move this platform, use the other rocket mounted on the side of the blocking platform, or attach a fan from your inventory if you have one.
With the platform moved, you can activate the tower.
Drop to the ground,
Eldin Canyon Skyview Tower
Location
Eldin Canyon Skyview Tower is an easy walk or ride east from Hyrule Castle. It is due East of the castle. From the road you will have to climb into the mountains to reach it.
- Tower Map Coordinates: 1637, 1182, 0225
How to Activate the Tower
The door is stuck shut on Eldin Canyon tower, but you can access this tower from another way: The top of the tower has been knocked off, so if you can reach that, you can activate the tower.
Perhaps Glide down from the mountain to the north and drop into the tower from the top, or use Recall on a nearby chunk of ruins that fell from the sky above while standing on it, then paraglide down into the tower.
Ulri Mountains Skyview Tower
Ulri Mountains Skyview Tower - Reveals the Akkala Region in the far northeast.
Location
The Ulri Mountain Skyview Tower is due east of Hyrule Castle. Several roads lead to it including one the passes from Hyrule Field up the east side of the castle and the veers right at a crossroads. From this road you can climb to the tower.
- Tower Map Coordinates: 3493, 2019, 0188
How to Activate the Tower
A man named Sawson will tell you why the Ulri Mountains Skyview Tower isn’t functional: A flying enemy Aerocuda has stolen the tower’s terminal!
The Aerocude enemy is visible flying behind the tower over the grassy plain.
Simply shoot an arrow at it to kill it, and use Ultrahand to grab the terminal it drops – it looks like a small footstool and will be highlighted by your Ultrahand. You can also simply pick up the terminal.
Walk it back to the tower and when you enter the tower doors with it, Sawson will fix the tower.
Click on a section below for a full puzzle guide, walkthrough, video guide, screenshots and locations for South Hyrule Skyview Towers.
Mount Lanayru Skyview Tower
Mount Lanayru Skyview Tower - Reveals the Lanayru region in the southeast.
Location
You will need 2X warm clothing, elixir, or food to safely climb to the Mount Lanayru Skyview Tower. It is on the far eastern coast atop Mount Lanayru, the tallest peak in the area, just north of Hateno Village. You can reach the peak by traveling east from Kakariko Village on roads, but you will have to leave the roads to climb the snowy peak.
- Tower Map Coordinates: 3845, -1306, 0539
How to Activate the Tower
Mount Lanayru tower is tough to reach and when you get there, it's open and ready to activate. Getting there requires a long, cold trudge up the slopes of Mount Lanayru: But you can make this much easier by using the L menu to select Recall and lookinging for yellow stones with telltale lines into the sky: These Sky Stones will be your elevator up Mount Lanayru.
Find one and you can ride it to the tower base with ease.
Rabella Wetlands Skyview Tower
Rabella Wetlands Skyview Tower - Reveals the Necluda region in the southeast.
Location
Rabella Wetlands Tower is almost due southwest of Hataeno Village, in the mountains. It is perhaps most reachable by gliding from the Popla Foothills Skyview Tower.
- Tower Map Coordinates: 2419, -2762, 0222
How to Activate the Tower
The Rabella Wetlands tower is caught in a rain storm that just won’t clear up – and to make things worse, its door is surrounded by vines with thorns/spikes that can only be burned away. To burn the thorns, you’ll need to keep them dry.
Facing the tower door, look for building materials just to the left. Here you’ll find a supply of wide, flat boards.
Your goal is to build a “roof” to place over the scaffolding on either side of the door that will block the rain from falling on the thorns so you can start a fire to burn them away.
Use Ultrahand to link the boards end-to-end and you can create a long, straight single piece of board to serve as a roof. Lift it and place it on the scaffolding above the thorns.
Now, search the area for flint and wood, which can be found in a small shelter in front of the tower (there is also a note here to read from the builders).
You can use many things to start a fire in the thorns, but if you drop the wood near them, drop flint on the wood, and hit the flint to start a fire, you’ll have more options: This will either light the thorns, or you can use a stick or arrow to further ignite them.
You might need to adjust your roof to cover the thorns better to get them all to burn. If you have arrows and a Fire Fruit your task will be easier as that causes an even bigger, fiery explosion.
Popla Foothills Skyview Tower
Location
The Popla Hills Skyview Tower is near Kakariko Village, sitting just southwest of the village, and over the hills from it. It is southeast of Lookout Landing and Hyrule Field. Approach it from the south and east side of the hill it lies perched on where a gradual slope leads straight to it.
- Tower Map Coordinates: 0603, -2123, 0098
How to Activate the Tower
Popla Hills Skyview Tower is open but its panel is dimmed and not functional. You cannot activate it without help. Investigate the well outside of the tower. Your helper is down this well!
You’ll need a rock hammer made of a stone and stick, although there are supplies in the well. First, jump into the well. Water at the bottom will save you from taking damage. Here you can escape any time with the use of Ascension on the ceiling to return to the surface.
Look for a wall you can destroy. Hit it with your hammer and move beyond it down the passage to find a thief in a prison. Talk to him.
From here you’ll need to find another entrance to his prison. One easy way to do this is to place a marker using your slate by clicking the RIGHT STICK and peering through the bars. Wherever this marker lands is likely near the entrance of the cave: The entrance to the other end of the thief’s cave is due south.
Popla Foothills Excavation Site Location
Use Ascend to reach the surface and walk south from the tower off a small cliff and turn around. You are looking for a cave entrance – NOT THE WELL nearby, this second well has treasure in it, but it’s not related to the tower. It’s called the Popla Foothills Excavation Site.
Enter the cave and step on the small footpad to free the thief. This will activate the tower above. Ascend to it and approach the pedestal inside to activate the tower. You can now step on the pad to unlock the area map.
Also in this cave is a treasure chest containing Topaz, in a room to the left, behind bars. As you leave this room you should notice a large square hole to investigate, in the wall opposite.
Gerudo Canyon Skyview Tower
Gerudo Canyon Skyview Tower - Reveals the Gerudo Desert region in the southwest.
Location
You will need cooling elixirs or food or armor/clothing before attempting this tower. There is ample Cool Saffina on the snowy plateau to the north of the tower in the Gerudo Highlands should you need it – cook it with meat to create cooling food.
Gerudo Canyon Skyview Tower is in the far southwest corner of Hyrule and southwest of the Hyrule Field Skyview Tower. It is on a high mesa to the southwest of the Great Plateau. It is difficult to reach as the canyon is now filled with water: One path is a road leading south from the west side of the Great Plateau crosses bridges befor beheading south and looping back up. If you float west from the Hyrule Field tower, you can climb high enough on the plateau to reach a point where you can float across south to the tower mesa and then climb up to it. It’s easy to reach once beneath it using the ladders and scaffolds on the cliff faces.
- Tower Map Coordinates: -2438, -2182, 1370
How to Activate the Tower
Greet Sawson at the base of the tower on an elevator he can’t get moving. Climb up to the base of the tower by the doors from here, or use recall on a fallen piece of ruins, if you see one fall from the sky. You will find a large deposit of crafting supplies here.
Your goal is to attach a heavy thing, or counter weight, to a hanging knob on the elevator platform ceiling.
Try using the metal crates in the pile of crafting supplies. You need to move close to attach the crate using the Ultrahand. Attaching it will lift Sawson to the tower and he will open it.
Gerudo Highlands Skyview Tower
Gerudo Highlands Skyview Tower - Reveals the Gerudo Highlands region in the southwest.
Location
You may need warm gear or warming food or elixirs before attempting this tower, depending on your approach. The Gerudo Highlands Skyview Tower is hard to reach due to it being completely hidden from view from all of Hyrule aside from the Gerudo Desert. For this reason, it’s smart to activate the Gerudo Canyon Skyview Tower first, before attempting the Gerudo Highlands Tower. The tower is located on a plateau due south of Rito Village and a smidge east.
You can paraglide much of the way to the Gerudo Highlands tower from the Gerudo Canyon Tower. It’s best to approach it from the east.
- Tower Map Coordinates: -3972, -1250, 0429
How to Activate the Tower
In one of the trickier Tower puzzles, the Gerudo Highlands tower is closed on the surface thanks to a snow drift that has buried it. You will need to find a place to use Ascend beneath it.
A note in a nearby camp points to a cave, but not the exact location of the cave. The cave is on the same level as the tower, just to the north along the cliff face. This cave leads down through several walls you can break with a stone affixed to a weapon.
At the bottom is a submerged river and some supplies. Place the large board in the water using Ultrahand and hop on. This will take you over a waterfall to another chamber with scaffolding sticking up out of a pool. Use your paraglider to jump off and land on the nearby beach.
Note that a treasure chest can be found through a small tunnel if you search along the wall on this lower cavern beach.
Look at your minimap in the corner of the screen: The scaffolding is directly beneath the tower. You need to use the board you floated in on, and a second one located on the beach, to glue together to make a raft out to the correct Ascend spot.
If you can line up a place to stand over the water directly on top of the tower icon, you can Ascend up into the tower.